http://www.twoityourself.com/2014/01/dresser-drawer-to-storage-box-easy-diy.html?spref=bl
Dresser Drawer to Storage Box {Easy DIY Project}
Oh boy I am so excited to share this one with you...it turned out way better than I could have anticipated and had I known what the end result would look like I wouldn't have dragged my feet on this project for so long. It was literally months in the making...but really it took me all of about 2 (kid-free) hours to complete.
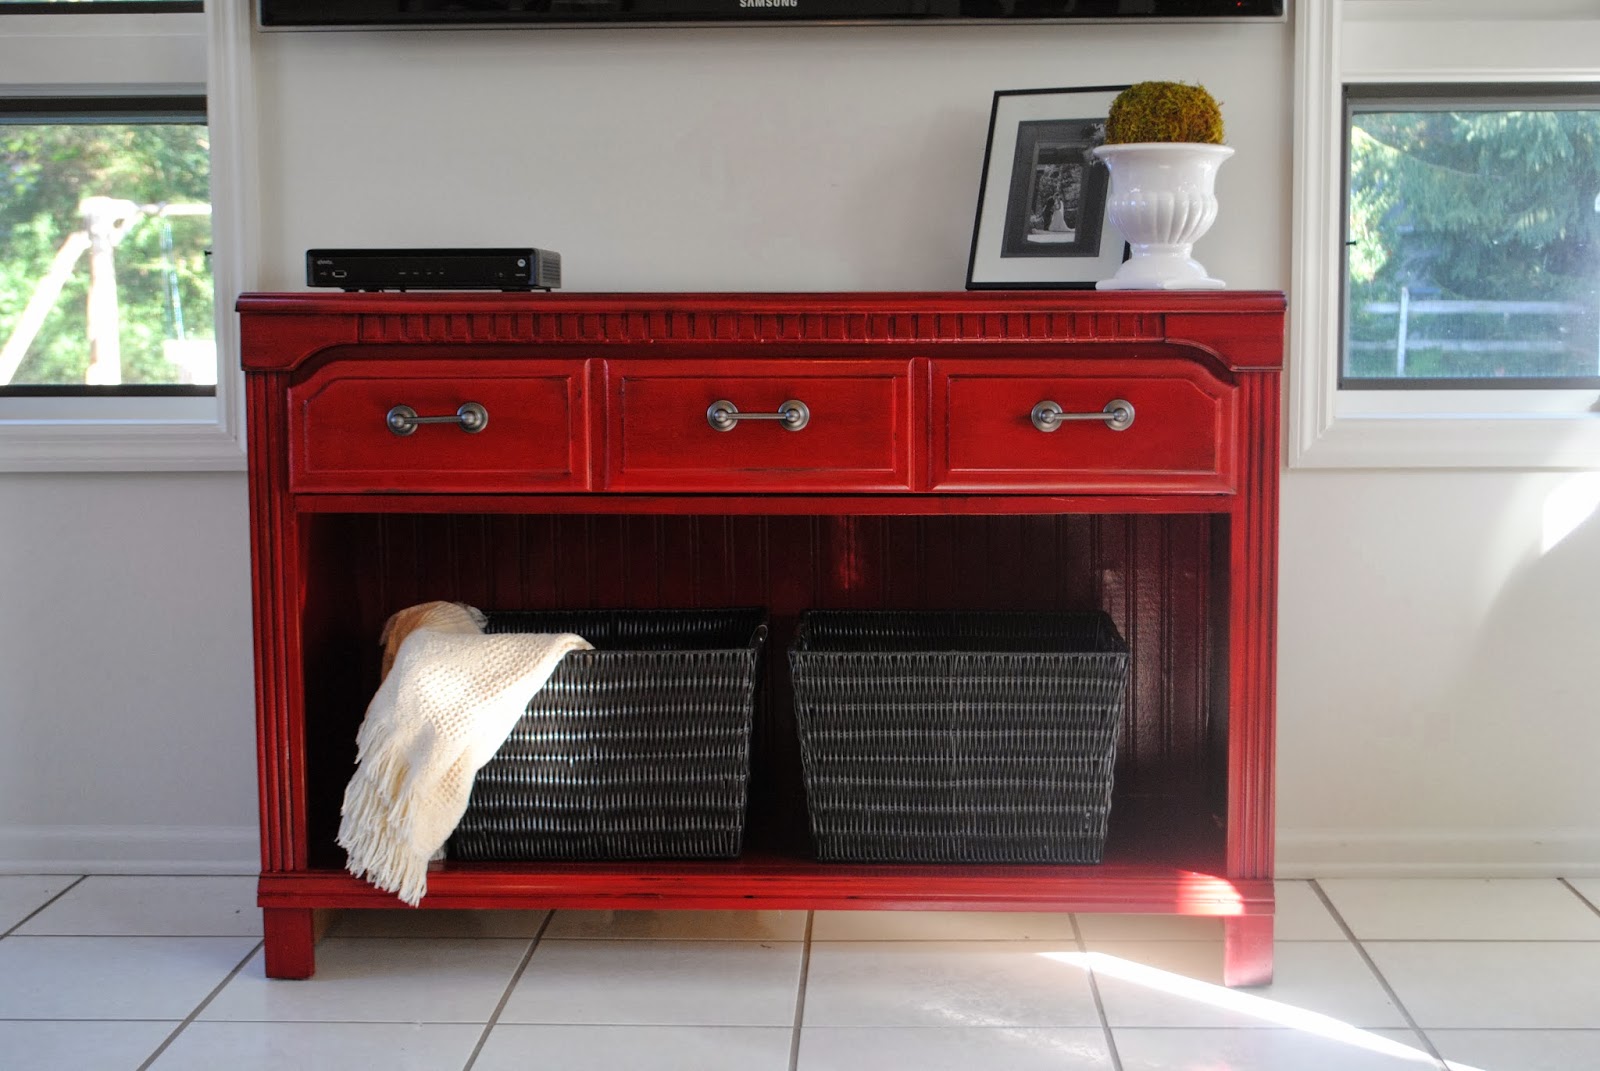
Several months ago I turned a thrifted three drawer wood dresser into a console table..perhaps you remember this beauty? She's pretty much my pride and joy. Which is why despite my plan to quickly flip her and sell her, I just couldn't part with Ms. Red. This week I finally got around to my second project from that same dresser.
Since I only used the top drawer in the flip, perhaps you are wondering what happened to the other two drawers where the baskets now are. I actually have had a few questions about their fate. One of the remaining two was used for parts in that dresser to table project and one has been sitting in my garage waiting patiently for me to get around to converting her into a raised storage box for quite some time.
All along I knew what I wanted to do with the single drawer. She would help me reclaim one of my laundry baskets long taken hostage by a mound of stuffed animals in daughter's room. But before the drawer could do anything, she needed a little TLC.
This is a really straight forward project and as far as flip, it's definitely beginner-level. I purchased four wood legs at the hardware store and four bolts. The unfinished legs were less than $5 each at Home Depot. The bolts were about 10 cents each. Apologies in advance for the dark photos from the dungeon...I mean garage.
I started by flipping the drawer over and pressing the screw sticking out of the top of the leg into the bottom of the drawer to make a small indentation to mark where each hole should be drilled. This just ensured the hole was far enough away from the corner and all sides. Then I used a small paddle bit to drill a hole through the bottom of the drawer.
Once all four holes were drilled it was just a matter of pressing the legs through from the bottom of the drawer and attaching the bolt on the inside of the drawer to keep each leg in place. Use a wrench or pliers to hold the bolt in place while you turn the leg a few final times. This will prevent the drawer from being wobbly.
Now it's time to pretty the drawer/box up. You can either leave the hardware on or remove it and fill the holes. I removed the drawer pulls and filled in the four holes with Elmer's Wood Filler. Wait for it to dry before sanding it smooth and then painting.
If you have been following 2IY for awhile you know I love chalk paint. It's great because there is no prep work required, no sanding, no priming, it sticks to anything, it goes on thick, it covers well and you can easily distress it. The most popular brand on the part is a bit steep for this thrifty girl (hello, I'm making a storage bin out of an old drawer I couldn't toss from another thrift store flip...did I mention I sold the mirror that came with the dresser to make back the money I spent on the dresser? See I'mthrifty cheap) which is why I always use my DIY Chalk paint recipe.
Dresser Drawer to Storage Box {Easy DIY Project}
Oh boy I am so excited to share this one with you...it turned out way better than I could have anticipated and had I known what the end result would look like I wouldn't have dragged my feet on this project for so long. It was literally months in the making...but really it took me all of about 2 (kid-free) hours to complete.

Several months ago I turned a thrifted three drawer wood dresser into a console table..perhaps you remember this beauty? She's pretty much my pride and joy. Which is why despite my plan to quickly flip her and sell her, I just couldn't part with Ms. Red. This week I finally got around to my second project from that same dresser.
Since I only used the top drawer in the flip, perhaps you are wondering what happened to the other two drawers where the baskets now are. I actually have had a few questions about their fate. One of the remaining two was used for parts in that dresser to table project and one has been sitting in my garage waiting patiently for me to get around to converting her into a raised storage box for quite some time.
All along I knew what I wanted to do with the single drawer. She would help me reclaim one of my laundry baskets long taken hostage by a mound of stuffed animals in daughter's room. But before the drawer could do anything, she needed a little TLC.
This is a really straight forward project and as far as flip, it's definitely beginner-level. I purchased four wood legs at the hardware store and four bolts. The unfinished legs were less than $5 each at Home Depot. The bolts were about 10 cents each. Apologies in advance for the dark photos from the dungeon...I mean garage.

I started by flipping the drawer over and pressing the screw sticking out of the top of the leg into the bottom of the drawer to make a small indentation to mark where each hole should be drilled. This just ensured the hole was far enough away from the corner and all sides. Then I used a small paddle bit to drill a hole through the bottom of the drawer.


Once all four holes were drilled it was just a matter of pressing the legs through from the bottom of the drawer and attaching the bolt on the inside of the drawer to keep each leg in place. Use a wrench or pliers to hold the bolt in place while you turn the leg a few final times. This will prevent the drawer from being wobbly.
Now it's time to pretty the drawer/box up. You can either leave the hardware on or remove it and fill the holes. I removed the drawer pulls and filled in the four holes with Elmer's Wood Filler. Wait for it to dry before sanding it smooth and then painting.
If you have been following 2IY for awhile you know I love chalk paint. It's great because there is no prep work required, no sanding, no priming, it sticks to anything, it goes on thick, it covers well and you can easily distress it. The most popular brand on the part is a bit steep for this thrifty girl (hello, I'm making a storage bin out of an old drawer I couldn't toss from another thrift store flip...did I mention I sold the mirror that came with the dresser to make back the money I spent on the dresser? See I'm
No comments:
Post a Comment