
Dimensions:
Dimensions:
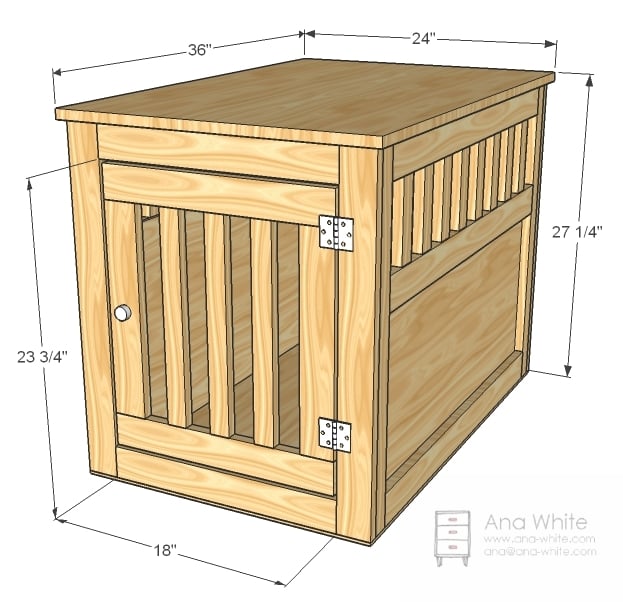
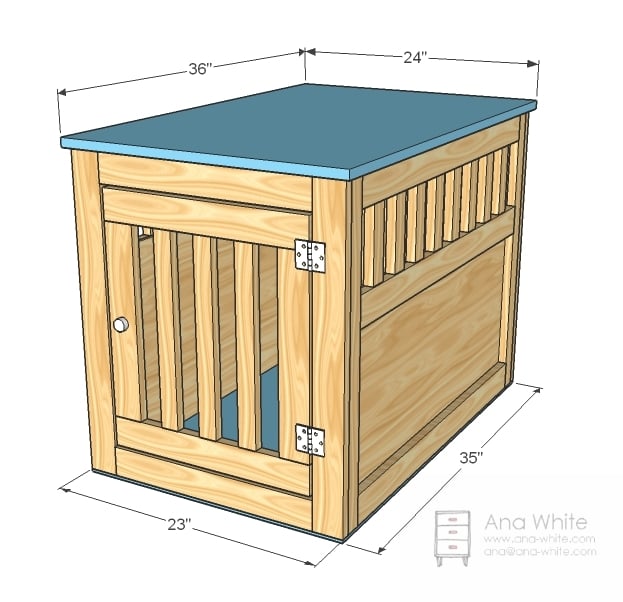
24" wide x 27" tall x 36" long. This is a big kennel.MATERIALS AND TOOLS
Shopping List:
1 – 24″ x 36″ Pine Project Panel or 3/4″ plywood or MDF
5 – 1×3 Boards, 8′ Long
1 – sheet of 1/4″ plywood
4 – 1×2 Boards, 8′ Long
1 – set of hinges
1 – latch
1 1/4″ pocket hole screws
wood glue
7/8″ wood screws (or shorter)
5 – 1×3 Boards, 8′ Long
1 – sheet of 1/4″ plywood
4 – 1×2 Boards, 8′ Long
1 – set of hinges
1 – latch
1 1/4″ pocket hole screws
wood glue
7/8″ wood screws (or shorter)
wood glue
wood filler
120 grit sandpaper
primer
wood conditioner
paint
paint brush
Tools:
measuring tape
square
pencil
safety glasses
hearing protection
drill
circular saw
sander
countersink drill bit
CUT LIST
Cut List:
21 – 1×2 @ 6″ (Rails)
6 – 1×3 @ 30 1/2″ (Side Boards)
4 – 1×2 @ 26 1/4″ (Side Legs)
4 – 1×3 @ 26 1/4″ (End Legs)
1 – 1/4″ Plywood @ 17 3/4″ x 33 1/2″
1 – 1/4″ Plywood @ 17 3/4″ x 21″
5 – 1×3 @ 18″ (Door Frame and Back Boards)
2 – 1×3 @ 17 1/2″ (Door Top and bottom)
2 – 1×2 @ 15 3/4″ (Door Sides)
3 – 1×2 @ 15 3/4″ (Door Rails)
GENERAL INSTRUCTIONS
Drill Pocket Holes
There is not way around it on this one – you gotta have a Kreg Jig™. Drill all pocket holes first.
STEP 1

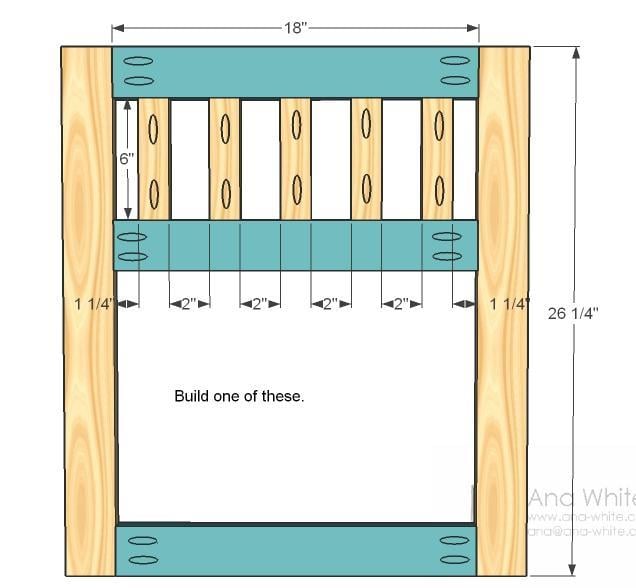
Build Side Railings
Build the side railings as shown above. Use 1 1/4″ pocket hole screws and glue.
STEP 2
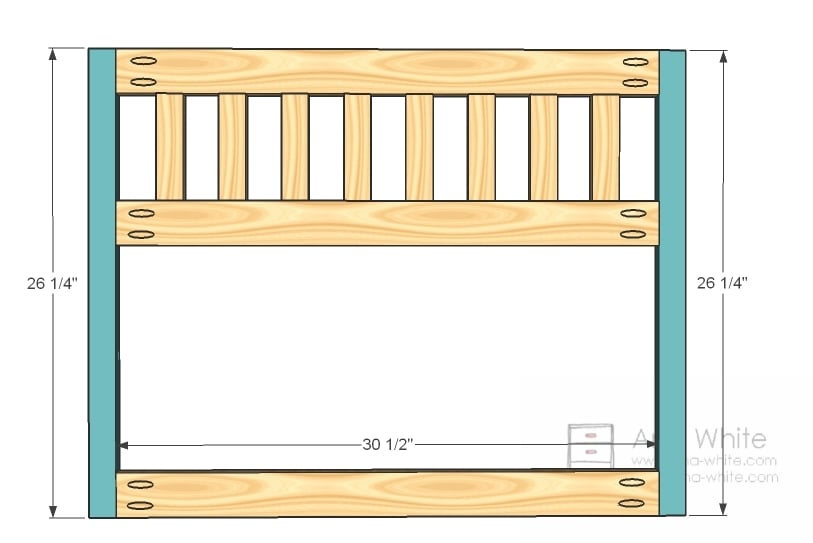
Sides
Finish building the sides as shown above. Use 1 1/4″ pocket hole screws and glue.
STEP 3

Plywood Sides
Add the plywood to the sides as shown above. Use 7/8″ screws and wood glue.
STEP 4
End
Build the end as shown above. Use 1 1/4″ pocket hole screws and glue.
STEP 5

Plywood for End
Now add the plywood. Use 7/8″ or shorter screws and glue.
STEP 6

Door
The door should be a piece of cake. Just mark and screw together with 1 1/4″ pocket hole screws and glue.
STEP 7
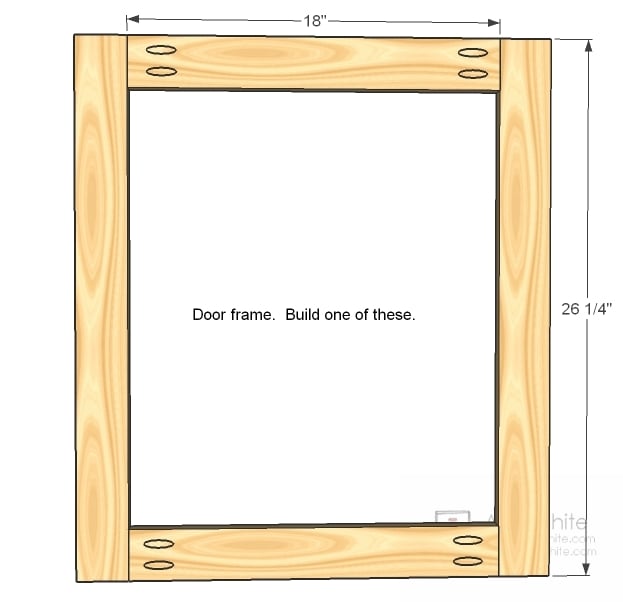
Door Frame
Build the door frame with 1 1/4″ pocket hole screws and glue.
STEP 8
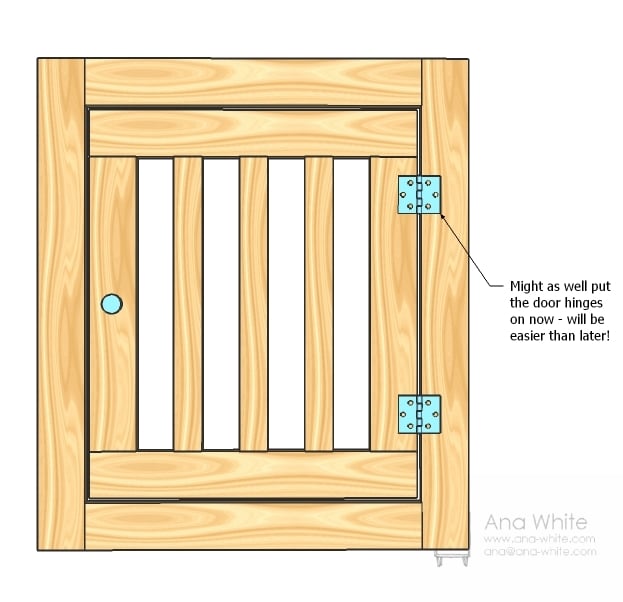
Door Hinges
Why not add the hinges while it’s easy? We did, and the hinges were much easier to install this way. I also installed the latch.
STEP 9

Assembly
So you have really just built four walls. Now assemble the walls! I highly recommend finishing the walls separately first – then you can easily assemble and reassemble the crate as needed. Another idea – use corner brackets to screw the walls together from the inside. Then you can break the crate down to flat pieces for storage and travel.
I filled all the pocket holes with wood filler three times and let dry. Then sanded with 120 grit sandpaper. Still need to paint
STEP 10
Top and Bottom
Screw the project panel to the top. We choose to leave the bottom off (our girls are house broken) but you could use some of the leftover 1/4″ plywood to make a bottom for the kennel. Simply line with plexiglass for a waterproof bottom.
No comments:
Post a Comment