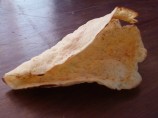
RoyalAlbert.com - Click Here!
Showing posts with label homemade. Show all posts

Sunday, March 29, 2015

Homemade Taco Shells #1

Photo

Homemade Taco Shells #1

  • Prep Time: 2 mins
  • Total Time: 22 mins
  • Servings: 4-6

About This Recipe

"These are so good, you may NEVER buy taco shells again! But be prepared to be the last one to have a chance to sit down and eat. As soon as I sit down to eat my first taco, my guests are needing their 3rd or 4th or 5th one cooked...But, it is well worth it to hear that these are the best tacos they have ever had!"

Ingredients

    • 1 cup flour
    • 1/2 cup yellow enriched cornmeal
    • 1/4 teaspoon salt
    • 1 1/2 cups water
    • 1 egg

Directions

  1. Preheat a dry skillet over medium/high heat.
  2. Mix the ingredients well.
  3. The batter will be runny.
  4. Drop by large utensil spoonful onto skillet, quickly spreading the batter in a circular motion, working from the inside out.
  5. Each side only takes about 1 minute of cooking.
  6. The shells are not supposed to brown.
  7. When the shells are removed from the pan, they can be molded into"taco shell shape" by placing, half-curled, between two objects, such as coffee cups.
  8. I like to serve them to each guest directly from the pan without molding them, however, becuz I find that they dont crack while still hot and pliable.
  9. Fill with all the taco stuffin's and enjoy!


NUTRITION FACTS

Serving Size: 1 (99 g)
Servings Per Recipe: 4
Amount Per Serving
% Daily Value
Calories 186.8
 
Calories from Fat 18
82%

Amount Per Serving
% Daily Value
Total Fat 2.0g
3%
Saturated Fat 0.5g
2%
Cholesterol 46.5mg
15%
Sugars 0.2 g
Sodium 171.7mg
7%
Total Carbohydrate 35.6g
11%
Dietary Fiber 1.9g
7%
Sugars 0.2 g
0%
Protein 6.0g
12%

Monday, March 9, 2015

Old-Fashioned Pine Tar Salve

Old-Fashioned Pine Tar Salve - Photo by Jan Berry (HobbyFarms.com)

Jan Berry
Hobby Farms Guest Blogger

Some of us grew up with a grandma or great-grandma who kept a jar of black salve on hand for all manner of skin ailments. Every family had their own special recipe, but it usually contained ingredients like tallow, lard, pine tar, chimney soot, or sometimes even onions and flour. It was thick and smelly, but it worked like a charm!
This modern-day adaptation of an old-fashioned home remedy will fill a 2-ounce glass jar. Because a little bit goes a long way, a single batch will last a family for several months. You can easily double or triple the amounts though, if a larger supply is needed.
Old-Fashioned Pine Tar Salve - Photo by Jan Berry (HobbyFarms.com)
Ingredients
  • 1/4 cup herb-infused olive, sunflower, or other light oil
  • 1 to 2 teaspoons beeswax
  • 1/2 tablespoon pine tar
  • 1/4 teaspoon activated charcoal
Preparation
For best results, infuse the oil with dried herbs first. Check your yard for plantain or violet leaves or use dried rose, calendula or lavender flowers. Let them air dry on a clean dishcloth for a few days until crumbly. Place the dried herbs in a small jar and pour twice as much oil over them. Cover the top with cheesecloth or a scrap of old T-shirt, using a rubber band to secure in place. Let the jar sit in a sunny window for a few days (or weeks) before straining. Store any leftover finished oil in a cool, dark place for up to one year.
For easiest cleanup, repurpose a used tin can to make this salve. You could also use a small, heat-proof canning jar.
Old-Fashioned Pine Tar Salve - Photo by Jan Berry (HobbyFarms.com)
Measure the oil and beeswax into the can or jar, and set it in a saucepan containing 1 to 2 inches water, creating a makeshift double boiler. Use 1 teaspoon beeswax for a softer ointment consistency or 2 teaspoons for a firmer salve. Heat on medium-low until the beeswax has melted.
Remove the jar from heat, and stir in the pine tar and charcoal with a disposable spoon. Immediately pour into a small glass jar and let cool before capping. Because of its strong drawing nature, avoid storing in metal tins or plastic containers, as the salve could potentially pull impurities from them over time. Shelf life is at least a year.
Use It
Old-Fashioned Pine Tar Salve - Photo by Jan Berry (HobbyFarms.com)
Dab a small amount on a bug bite, splinter, boil or other skin irritation. Cover with a bandage for several hours or overnight. Wash off and repeat as necessary.
Maker’s Tips
  • Pine tar can usually be found in in the horse section of your local feed store. It can be made two different ways: open kiln or kiln method. Because the open-kiln method could potentially produce small amounts of creosote (a carcinogen), try to find the closed-kiln type for this project. A popular brand for making salves and soaps is Auson http://www.amazon.com/Kiln-Burn-Pine-Tar-Liter/dp/B000P7K46S. Unfortunately, because it's imported from Sweden, it's also quite expensive. For brands you find locally, check their website or customer service number to help determine the type of pine tar they offer. They won't be able to advise you on use for humans, though, as their products are only tested and intended as a horse-hoof treatment.
  • Activated charcoal is recommended to have on hand for poison control or food poisoning. You can usually find it in a drug store, pharmacy section of your grocery store or a health store. If you can only get it in capsules, just break open enough of them to reach the 1/4 teaspoon needed for the recipe.
  • Castor oil makes a wonderful addition to this salve and can be used for part of the oil portion.
  • Place a piece of wax paper over your work area when handling pine tar and activated charcoal. If spilled, they could stain light-colored countertops. The finished salve will also stain clothing, so apply carefully.
  • While this is an excellent home remedy for minor ailments, consult with a qualified health care professional for serious injuries and wounds.

Friday, February 20, 2015

Make Your Own Laundry Detergent

Make Your Own Laundry Detergent - 6 ingredients, cost you about $28 a year, this recipe makes a batch that will last a year! Works in HE washers and with cold water too! (Recipe back by popular demand)
Ingredients -
1 (4 lb 12 oz) Box of Borax- Found in the detergent aisle
1 (3 lb 7 oz) Box of Arm & Hammer Super Washing Soda- Found in the detergent aisle
1 (3 lb) Container of OxyClean- Found in the detergent aisle. (This is optional but I highly recommend adding it)
2 (14.1 oz) Bars of Zote Soap- Found in the detergent aisle (we chose to do pink for the scent but the white would be just fine. You can also use Fels Naptha)
1 (4 lb) Box of Arm & Hammer Baking Soda- Found in the cooking aisle (You could also get two 2 lb box, we couldn’t find the larger 4lb box when we went)
1-2 (55 oz) Bottle of Purex Crystals Fabric Softener- or use 3-4 bottles of Scentsy Washer Whiffs. Scentsy washer whiffs are my top choice, (they smell out-of-this-world amazing – my favorite is Quiver), but when in a hurry, I opt for the Purex, (which can be found in the detergent aisle).
The hardest most time consuming part is grating the cheese soap. It looks like pink cheese….has anyone ever seen pink cheese? If you do not have a food processor you will need to use a typical hand grater. We would recommend using a large mixing bowl to grate into and using the fine side of the grater. Another option is to microwave the soap before hand. First, cut the bar into chunks or slices. Pop it into the microwave for about a minute. It will expand… a lot…but then it is dry and just crumbles into tiny bits! The hardest part is now over and all that’s left is to mix everything together. Use a very large bucket and take a layering approach to mix it easier. Take a small amount of each ingredient and layer it on top of each other, then grab a large mixing spoon and mixed it together. Do this about 5 times. This is so much easier than dumping all the ingredients in at once and then trying to u it well. This batch makes A TON! Now for probably the best part…you only need 1-2 Tablespoons per load depending on the size. Now here comes the stroke of genius, if you opted to put the Purex Crystals in your batch, you can scoop the detergent right into your bottle and use the cap as your measuring spoon. There are 3 lines on the side and the middle one is approximately 2 Tablespoons…genius right?

Saturday, January 10, 2015

Walter Sands' Basic White Bread


Walter Sands made this bread faithfully once a week for years. Walter was the father of Frank E. Sands, King Arthur Flour's current chairman of the board. Because of his arthritic hands, Walter used a bread bucket with a crank, which kneaded hundreds of loaves of this fragrant, soft sandwich bread with all its happy associations. The recipe makes two loaves, and we'll show you how to turn the second into a raisin-cinnamon swirl variation for an extra treat.

Recipe summary

 Hands-on time:
 
30 mins. to 40 mins.
 Baking time: 
35 mins. to 40 mins.
 Total time: 
3 hrs to 4 hrs 
 Yield: 
2 loaves, 32 slices

Dough

Cinnamon-Raisin Swirl

  • 3 tablespoons butter, melted and cooled
  • 1 cup raisins
  • 1/2 cup brown sugar
  • 1 teaspoon cinnamon

Directions

  1. 1) Pour the warm water into a mixing bowl. Add and let dissolve the sugar or honey and then the yeast.
  2. 2) When the yeast is bubbling, add the butter, 3 cups of flour, the dry milk, and salt. Mix together.
  3. 3) Stir in another 2 1/2 cups of flour, keeping the last 1/2 cup in reserve. Knead the dough for 3 to 4 minutes, until it begins to behave as if it belongs together. Cover and let the dough rest while you clean and grease the mixing bowl.
  4. 4) Continue kneading for 3 or 4 more minutes, until the dough feels smooth and springy. Use up to 1/2 cup of the reserved flour, if necessary, to keep the dough from sticking to the kneading surface.
  5. 5) Place the dough in the greased bowl, turn it over to coat both sides, and cover the bowl. Let it rise in a draft-free place until doubled, 1 to 2 hours. Deflate the dough, and divide it in half. Form into loaves (or make into cinnamon-raisin bread as described in tips, below), and place in greased 8 1/2" x 4 1/2" pans. Cover with greased plastic wrap and let rise until the dough domes an inch above the rim of the pans.
  6. After the dough has been rising for 20 minutes, preheat the oven to 350°F. When the loaves are sufficiently risen, bake for 35 to 40 minutes, or until nicely browned and the center of the loaves reads 190°F when measured with an instant-read thermometer. Remove from the oven and tip the breads out of their pans. Place on a rack to cool completely before slicing.

Tips from our bakers

  • You can make this bread with milk instead of water; just bring 2 cups of milk to a simmer, then cool to lukewarm before using.
  • For cinnamon-swirl bread, roll each piece of dough into a rough 9" x 15" rectangle. Spread each piece with half the melted butter, then sprinkle with half the raisins, sugar, and cinnamon. Starting with a short edge, roll into a cylinder. Place the loaves in the pans, seam-side down, and let rise and bake as directed at right.
  • Want to make this bread using a mixer, or a bread machine set on the dough cycle? Combine all of the ingredients except 1/2 cup of the flour. Mix and knead, using your machine of choice, and adding just enough of the remaining 1/2 cup flour (if necessary) to make a soft, slightly sticky dough. Continue at step 5, letting the dough rise in a bowl, then finishing the bread as directed.

Tuesday, December 9, 2014

Healthy Pumpkin Dog Cookies


This snack is not only delicious but is also filled with fiber, vitamin A, beta-carotene, potassium, and iron.
I made this recipe and my dogs loved it!
Didn't have molasses so I used karo instead.  

    Ingredients
  • 1/2 cup canned pumpkin
  • 4 tbsp molasses
  • 4 tbsp water
  • 2 tbsp vegetable oil
  • 2 cups whole wheat flour
  • ¼ tsp baking soda
  • ¼ tsp baking powder
  • 1 tsp cinnamon (optional)

    Directions
  1. Preheat oven to 350 degrees
  2. Mix pumpkin, molasses, vegetable oil, and water together in a bowl
  3. Add the whole wheat flour, baking soda, baking powder and cinnamon to the mixture and stir until dough softens
  4. Scoop out small spoonfuls of dough and roll into balls on your hands (wet hands work best)
  5. Set the balls onto a lightly greased cookie sheet and flatten with a fork
  6. Bake approximately 25 minutes until dough is hardened.


Friday, November 28, 2014

Homemade Flea Powder Recipe:


Homemade Flea Powder Recipe:


Ingredients:

1 cup Food Grade Diatomaceous Earth (find HERE)
1/2 cup Neem Powder (find HERE)
1/2 cup Yarrow Powder (find HERE)
20 Drops Eucalyptus Essential Oil* (find HERE)  *Leave out the essential oil if using for cats.


Directions:

Mix all ingredients together and put in a shaker top container. I used a mason jar with a shaker top lid (I got my mason jar shaker top lid at Christmas Tree Shop, but you could make your own by drilling holes in a regular mason jar lid).   
Apply from head to tail along your pets spine in dry conditions. Brush your pets fur going the opposite direction so the powder comes in contact with the skin. Avoid the eyes and nose. Rub the powder on the belly and legs. Try to get the flea powder on as much skin as you can.
I have found that brushing the fur in the opposite direction and applying the flea powder with a cosmetic puff (like THIS) works really well. I also found the fleas seem to like the tail, the area right above the tail and the belly/groin area so I made sure to pay extra attention to those areas to get them well covered.  

How often to apply flea powder?

To use this as a general repellent (with no serious flea infestation), applying once a month during active flea season (end of spring/summer) is sufficient. If the pet gets a bath or gets wet, it will need to be reapplied.  

Thursday, November 27, 2014

107 Used Wood Pallet Projects and Ideas

107-pallet-project-ideas

Has any one item been reused more creatively, with more functional use and more practical application than the lowly used wood pallet? An item made for the simple task of helping to move large and heavy objects in warehouses. Has any one item been recycled, upcycled more spectacularly than the wood pallet? I would wager than there is not an object so often transformed into a useful object than this stack of wooden planks pieced together to form a small slab for the simple transportation of other sometimes more useful objects and products.

In an effort to bring every idea or wood pallet project onto one web page, we present 107 Used Wood Pallet Projects & Ideas to spark you creativity or inspire you to create then next pallet project.

And if you are wondering where to get a used wood pallet, here are some ideas: Any warehouse around the area you live will likely give them to you for free. Call your local grocery stores customer service dept, and ask for a manager. Tell them you’re a long time shopper of the store, and need these pallets. Pallets are sometimes available from printing companies too. Check in the Craigslist “free” section too. I have seen pallets there as well.

We have categorized the pallet projects below so keep scrolling until you see something you might like to try.

Wednesday, October 22, 2014

Peasant Bread: The Best Easiest Bread You Will Ever Make!


For complete instructions click here!

Ingredients

4 cups (510 g | 1 lb. 2 oz) all-purpose flour* (do not use bleached all-purpose)
2 teaspoons kosher salt
2 cups lukewarm water**
2 to 3 teaspoons sugar (I use 2, my mom uses 3 — difference is negligible)
2 teaspoons active-dry yeast***
room temperature butter, about 2 tablespoons

* My mother always uses 1 cup graham flour and 3 cups all-purpose or bread flour. Also, you can use as many as 3 cups of whole wheat flour, but the texture changes considerably. I suggest trying with all all-purpose or bread flour to start and once you get the hang of it, start trying various combinations of whole wheat flour and/or other flours. Also, measure scant cups of flour if you are not measuring by weight: scoop flour into the measuring cup using a separate spoon or measuring cup; level off with a knife. The flour should be below the rim of the measuring cup.

** To make foolproof lukewarm water that will not kill the yeast (water that's too hot can kill yeast), boil some water — I use my teapot. Then, mix 1 1/2 cups cold water with 1/2 cup boiling water. This ratio of hot to cold water will be the perfect temperature for the yeast.

***I buy Red Star yeast in bulk (2lbs.) from Amazon. I store it in my freezer, and it lasts forever. If you are using the packets of yeast (the kind that come in the 3-fold packets), just go ahead and use a whole packet — I think it's 2.25 teaspoons. I have made the bread with active dry and rapid rise and instant yeast, and all varieties work. If you are interested in buying yeast in bulk, here you go: Red Star Baking Yeast Also, if you buy instant yeast, there is no need to do the proofing step — you can add the yeast directly to the flour — but the proofing step does just give you the assurance that your yeast is active. I love SAF instant yeast, which can be purchased from King Arthur flour as well as Amazon.

Instructions

Mixing the dough:
• If you are using active-dry yeast: In a small mixing bowl, dissolve the sugar into the water. Sprinkle the yeast over top. There is no need to stir it up. Let it stand for about 10 to 15 minutes or until the mixture is foamy and/or bubbling just a bit — this step will ensure that the yeast is active. Meanwhile, in a large bowl, whisk together the flour and salt. When the yeast-water-sugar mixture is foamy, stir it up, and add it to the flour bowl. Mix until the flour is absorbed.

• If you are using instant yeast: In a large mixing bowl, whisk together the flour, salt, sugar, and instant yeast. Add the water. Mix until the flour is absorbed.
Cover bowl with a tea towel or plastic wrap and set aside in a warm spot to rise for at least an hour. (If you have the time to let it rise for 1.5 to 2 hours, do so — this will help the second rise go more quickly.) This is how to create a slightly warm spot for your bread to rise in: Turn the oven on at any temperature (350ºF or so) for one minute, then turn it off. Note: Do not allow the oven to get up to 300ºF, for example, and then heat at that setting for 1 minute — this will be too hot. Just let the oven preheat for a total of 1 minute — it likely won't get above 300ºF. The goal is to just create a slightly warm environment for the bread. My mother always covers the dough with a tea towel that she has run under hot water and rung out so it's just damp.
Preheat the oven to 425ºF. Grease two oven-safe bowls (such as the pyrex bowls I mentioned above) with about a tablespoon of butter each. (My mother might use even more — more butter not only adds flavor but also prevents sticking). Using two forks, punch down your dough, scraping it from the sides of the bowl, which it will be clinging to. As you scrape it down try to turn the dough up onto itself if that makes sense. You want to loosen the dough entirely from the sides of the bowl, and you want to make sure you've punched it down. Take your two forks and divide the dough into two equal portions — eye the center of the mass of dough, and starting from the center and working out, pull the dough apart with the two forks. Then scoop up each half and place into your prepared bowls. This part can be a little messy — the dough is very wet and will slip all over the place. Using small forks or forks with short tines makes this easier — my small salad forks work best; my dinner forks make it harder. It's best to scoop it up fast and plop it in the bowl in one fell swoop. Let the dough rise for about 20 to 30 minutes on the countertop near the oven (or near a warm spot) or until it has risen to just below or above (depending on what size bowl you are using) the top of the bowls. (Note: I do not do the warm-oven trick for the second rise. I simply set my bowls on top of my oven, so that they are in a warm spot. Twenty minutes in this spot usually is enough for my loaves.)
Bake for 15 minutes. Reduce the heat to 375º and make for 15 to 17 minutes longer. Remove from the oven and turn the loaves onto cooling racks. If you've greased the bowls well, the loaves should fall right out onto the cooling racks. If the loaves look a little pale and soft when you've turned them out onto your cooling racks, place the loaves into the oven (outside of their bowls) and let them bake for about 5 minutes longer. Remove from oven and let cool for 10 minutes before cutting.

Sunday, February 2, 2014

Homemade Coffee Creamer – Over 2 Dozen Flavor Varieties!


For whatever flavor of creamer you want, you start off with the same basic ‘base’ recipe.

14oz sweetened condensed milk
1 3/4 cup milk or cream (whole, lowfat, skim, almond, soy, heavy cream, half & half etc – whatever your preference, however the more fat, the more creaminess)

Mix the ingredients together well. Add them to a mason jar and shake it like crazy or you could also opt to use an old (washed) creamer container.

French Vanilla Creamer
2 teaspoons vanilla extract OR vanilla coffee syrup

Vanilla Bean Coffee Creamer
2 teaspoons vanilla bean paste

Chocolate
2-3 tablespoons chocolate syrup
(1 tsp vanilla extract, optional)

Chocolate Almond
1 tablespoon cocoa powder
1 teaspoon almond extract

Strudel
1 tablespoon cinnamon
1 teaspoon vanilla extract
1 teaspoon almond extract

Vanilla Caramel
2 tablespoons caramel ice cream topping
2 teaspoons vanilla extract

Chocolate Raspberry
2 teaspoons cocoa powder
2 tablespoons raspberry syrup

Irish Cream
2 tablespoons chocolate syrup
1 teaspoon instant coffee
1-2 teaspoons vanilla extract
1 teaspoon almond extract

Coconut
2 teaspoons coconut extract

Samoa (like the Girl Scout Cookies)
2 teaspoons coconut extract (or sub coconut milk or cream of coconut, heated & strained, for the milk/cream)
2 tablespoons chocolate syrup
2 tablespoons caramel ice cream topping

Peppermint Patty
2 tablespoons chocolate syrup
1 teaspoon peppermint extract

Cinnamon Vanilla
2 teaspoons cinnamon
2 teaspoons vanilla extract

Pumpkin Spice
3 tablespoons pureed pumpkin
1 teaspoon pumpkin pie spice
4 tablespoons maple syrup
1 teaspoon vanilla extract

Honey Vanilla
1/4 cup honey
2 teaspoons vanilla extract

Almond Joy
1-2 teaspoons coconut extract (or sub coconut milk or cream of coconut if you heat it first, strained, in place of the milk & extract)
1 teaspoon almond extract
2 tablespoons chocolate syrup

Sweet Cream
Use 1 3/4 cups of heavy cream instead of the milk in the base recipe
2 teaspoons vanilla extract OR the inside of a vanilla bean, scraped
1 teaspoon almond extract

Chocolate Orange
2 tablespoons chocolate syrup
1-2 teaspoons orange extract

Hazelnut
2 teaspoons hazelnut extract

Chocolate Hazelnut
2 tablespoons chocolate syrup
2 teaspoons hazelnut extract

Cinnamon Cake
2 teaspoons cinnamon
2 teaspoons vanilla extract

Salted Caramel
2-3 tablespoons caramel ice cream topping
1/2 teaspoon salt

Eggnog
replace milk in base recipe with equal amount of heavy cream
1 teaspoons vanilla extract
2 teaspoons rum extract
1 teaspoon ground nutmeg

Toasted Almond
2 teaspoons almond extract

Directions & Tips:
In all these recipes, anything that has a dry or thick ingredient (like cinnamon, honey, etc..) should be heated up with a small amount of your milk/cream from the base recipe so it can dissolve properly. You don’t want grainy creamer! Then, add the rest of the milk/cream along with the sweetened condensed milk.

If you want really creamy creamer, use heavy cream instead of milk in your base recipe.

You'll want to stick a piece of tape on they mason jar lid with the expiration date from the milk used. Use this as a guideline as to when the creamer should be used by.

Homemade Taco Seasoning Mix

  • 1 tablespoon chili powder
  • ½ teaspoon garlic powder
  • ¼ teaspoon onion powder
  • ¼ teaspoon crushed red pepper flakes
  • ½ teaspoon dried oregano
  • ½ teaspoon paprika
  • 1½ teaspoons ground cumin
  • 1 teaspoon sea salt
  • 1 teaspoon black pepper
Instructions
  1. Mix together all ingredients. Store in an airtight container until ready to use.
  2. When you are ready to use use your Homemade Taco Seasoning, use about 2 tablespoons per 1 pound of meat. 
  3. Brown your beef and drain off fat. Sprinkle seasoning evenly over meat and add 3/4 cup of water. Simmer until water is adsorbed.
Wide Width Damask Jacquard Curtain  - Besthomefashion.com

View more gifts at Zazzle.

Blog Archive