RoyalAlbert.com - Click Here!
Showing posts with label recipe. Show all posts

Saturday, January 27, 2024

Iron Skillet Cornbread with Ham and Cheese with Jiffy Mix!


Iron Skillet Cornbread with Ham and Cheese with Jiffy Mix!

We love this recipe, and it's easy!

Preheat oven to 400 degrees.

Ingredients:

1 Package Jiffy Mix cornbread mix.
2 Eggs
1 Cup Milk
1/2 Pound cubed ham
About 2" from a block of Velveeta cheese, cubed, or about a cup of your preferred cheese. 
1 Small onion, chopped

Mix Jiffy Mix as directed with eggs and milk, then
add ham, cheese, and onion.

Pour into greased iron skillet and place into oven for about 30 minutes,
or until top is golden brown. Slice and serve! We actually had more than one slice!

Saturday, December 16, 2023

Ann Page Stuffing from years ago!


My great aunt used to make the Thanksgiving turkey stuffing from this recipe! Every year she'd pull out this can of poultry seasoning and continue with her tradition.  Now that she's gone, I've continued the tradition with the same little can of seasoning!  

Instructions:


Melt 1/2 cup butter or margarine in large skillet.  Add 2 large onions, minced, 1 1/2 cups chopped celery (or part apple), 8 cups dry bread cubes, 2 teaspoons salt, 1 teaspoon pepper, 1 teaspoon paprika, 1 tablespoon Poultry Seasoning.  Mix well.  Enough to stuff a 10 pound turkey.  

She'd add the giblets from the inside package of the turkey, chopped, and some canned Swanson chicken broth.  

I remember helping her cut 2 frozen loaves of white bread into cubes and baking it at a low oven. Being frozen kept the bread from getting squished!  

Good memories!


Sunday, March 29, 2015

Homemade Taco Shells #1

Photo

Homemade Taco Shells #1

  • Prep Time: 2 mins
  • Total Time: 22 mins
  • Servings: 4-6

About This Recipe

"These are so good, you may NEVER buy taco shells again! But be prepared to be the last one to have a chance to sit down and eat. As soon as I sit down to eat my first taco, my guests are needing their 3rd or 4th or 5th one cooked...But, it is well worth it to hear that these are the best tacos they have ever had!"

Ingredients

    • 1 cup flour
    • 1/2 cup yellow enriched cornmeal
    • 1/4 teaspoon salt
    • 1 1/2 cups water
    • 1 egg

Directions

  1. Preheat a dry skillet over medium/high heat.
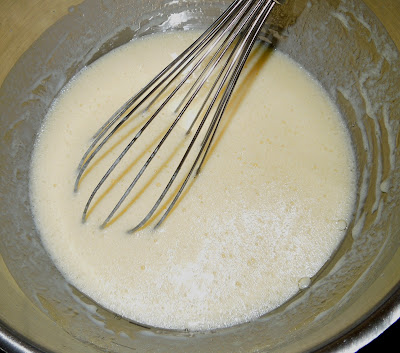
  2. Mix the ingredients well.
  3. The batter will be runny.
  4. Drop by large utensil spoonful onto skillet, quickly spreading the batter in a circular motion, working from the inside out.
  5. Each side only takes about 1 minute of cooking.
  6. The shells are not supposed to brown.
  7. When the shells are removed from the pan, they can be molded into"taco shell shape" by placing, half-curled, between two objects, such as coffee cups.
  8. I like to serve them to each guest directly from the pan without molding them, however, becuz I find that they dont crack while still hot and pliable.
  9. Fill with all the taco stuffin's and enjoy!


NUTRITION FACTS

Serving Size: 1 (99 g)
Servings Per Recipe: 4
Amount Per Serving
% Daily Value
Calories 186.8
 
Calories from Fat 18
82%

Amount Per Serving
% Daily Value
Total Fat 2.0g
3%
Saturated Fat 0.5g
2%
Cholesterol 46.5mg
15%
Sugars 0.2 g
Sodium 171.7mg
7%
Total Carbohydrate 35.6g
11%
Dietary Fiber 1.9g
7%
Sugars 0.2 g
0%
Protein 6.0g
12%

Tuesday, March 17, 2015

Easy salsa recipe


Ingredients

6 tomatoes
3 jalapenos (warning: hot)
1 medium white onion
1/2 a medium red onion
1 cup cilantro (I’m a fiend- so a little less if you aren’t)
5 cloves garlic
3 limes juice (hell, I even threw in some of the pulp)
1 tbsp cumin
1 tsp sea salt (More can always be added but not taken away!)
1 tsp chili powder
Optional/Seasonal:

How to make this recipe

First of all you need 1 cup (2-3 ears) of grilled/pan fried corn. If pan frying it, try putting in 3 tbsp of pineapple juice & 2 tbsp EVOO. Since you are using pans now, I would probably add the garlic, salt, 1/2 the cilantro, cumin & chili powder now.
Sweeten it up with some diced fruit of your choice- pineapple, mango, peach etc.

Monday, March 9, 2015

Old-Fashioned Pine Tar Salve

Old-Fashioned Pine Tar Salve - Photo by Jan Berry (HobbyFarms.com)

Jan Berry
Hobby Farms Guest Blogger

Some of us grew up with a grandma or great-grandma who kept a jar of black salve on hand for all manner of skin ailments. Every family had their own special recipe, but it usually contained ingredients like tallow, lard, pine tar, chimney soot, or sometimes even onions and flour. It was thick and smelly, but it worked like a charm!
This modern-day adaptation of an old-fashioned home remedy will fill a 2-ounce glass jar. Because a little bit goes a long way, a single batch will last a family for several months. You can easily double or triple the amounts though, if a larger supply is needed.
Old-Fashioned Pine Tar Salve - Photo by Jan Berry (HobbyFarms.com)
Ingredients
  • 1/4 cup herb-infused olive, sunflower, or other light oil
  • 1 to 2 teaspoons beeswax
  • 1/2 tablespoon pine tar
  • 1/4 teaspoon activated charcoal
Preparation
For best results, infuse the oil with dried herbs first. Check your yard for plantain or violet leaves or use dried rose, calendula or lavender flowers. Let them air dry on a clean dishcloth for a few days until crumbly. Place the dried herbs in a small jar and pour twice as much oil over them. Cover the top with cheesecloth or a scrap of old T-shirt, using a rubber band to secure in place. Let the jar sit in a sunny window for a few days (or weeks) before straining. Store any leftover finished oil in a cool, dark place for up to one year.
For easiest cleanup, repurpose a used tin can to make this salve. You could also use a small, heat-proof canning jar.
Old-Fashioned Pine Tar Salve - Photo by Jan Berry (HobbyFarms.com)
Measure the oil and beeswax into the can or jar, and set it in a saucepan containing 1 to 2 inches water, creating a makeshift double boiler. Use 1 teaspoon beeswax for a softer ointment consistency or 2 teaspoons for a firmer salve. Heat on medium-low until the beeswax has melted.
Remove the jar from heat, and stir in the pine tar and charcoal with a disposable spoon. Immediately pour into a small glass jar and let cool before capping. Because of its strong drawing nature, avoid storing in metal tins or plastic containers, as the salve could potentially pull impurities from them over time. Shelf life is at least a year.
Use It
Old-Fashioned Pine Tar Salve - Photo by Jan Berry (HobbyFarms.com)
Dab a small amount on a bug bite, splinter, boil or other skin irritation. Cover with a bandage for several hours or overnight. Wash off and repeat as necessary.
Maker’s Tips
  • Pine tar can usually be found in in the horse section of your local feed store. It can be made two different ways: open kiln or kiln method. Because the open-kiln method could potentially produce small amounts of creosote (a carcinogen), try to find the closed-kiln type for this project. A popular brand for making salves and soaps is Auson http://www.amazon.com/Kiln-Burn-Pine-Tar-Liter/dp/B000P7K46S. Unfortunately, because it's imported from Sweden, it's also quite expensive. For brands you find locally, check their website or customer service number to help determine the type of pine tar they offer. They won't be able to advise you on use for humans, though, as their products are only tested and intended as a horse-hoof treatment.
  • Activated charcoal is recommended to have on hand for poison control or food poisoning. You can usually find it in a drug store, pharmacy section of your grocery store or a health store. If you can only get it in capsules, just break open enough of them to reach the 1/4 teaspoon needed for the recipe.
  • Castor oil makes a wonderful addition to this salve and can be used for part of the oil portion.
  • Place a piece of wax paper over your work area when handling pine tar and activated charcoal. If spilled, they could stain light-colored countertops. The finished salve will also stain clothing, so apply carefully.
  • While this is an excellent home remedy for minor ailments, consult with a qualified health care professional for serious injuries and wounds.

Saturday, December 27, 2014

Iron Skillet Ham and Cheddar Cornbread


I have a 10 inch cast  iron skillet that my Mom gave to me several years ago.  I came across my skillet while sorting through my cabinets recently and after one look it was obvious, that it needed a little TLC.  So, I set about to bring my skillet back to life.   Cast iron skillets need to be used and kept "seasoned." New cast iron skillets have been pre-seasoned during manufacturing, but, if you're as fortunate as I am, to have a forgotten "hand me down" skillet you may need to bring it back to life. 

After a little research, I was able to re-season it successfully, and I was chomping at the bit to give it a whirl.  So, I decided to bake a batch of ham and cheddar cornbread to use some of our delectable ham left over from the weekend. If you've never cooked in cast iron,  you are really in for a treat!  Food actually tastes different when cooked in cast iron.  Having my cast iron skillet back in use, only sets my mind spinning as to what I can cook in it next...so, you'll be seeing more dishes cooked up in my newly re-seasoned diamond in the rough!  


 You'll need:
2 Tbsp solid vegetable shortening
Dry ingredients:
1 cup all purpose flour
1 cup plain white cornmeal [I used Martha White]
3 Tbsp sugar
1 Tbsp baking powder
1 tsp salt
1/2 tsp onion powder
1/4 tsp garlic powder
Wet ingredients:
1 3/4 cups buttermilk
1/4 cup vegetable oil
2 large eggs
Mix ins:
1 cup small diced ham
1 1/4 cup shredded sharp cheddar cheese, divided
1 cup whole kernel sweet corn
4 chopped green onions

Directions:
Preheat the oven to 425°F.  Place 2 tablespoons of solid vegetable shortening into 
the cast iron skillet and set it into the oven to preheat and melt the shortening. 
We're going to discard most of the shortening after it melts, but, we need it to 
generously coat the skillet before adding the batter.   In a medium mixing bowl, 
sift together the dry ingredients.


In a separate bowl, whisk together 1 3/4 cups of buttermilk, 1/4 cup of vegetable oil,  
and 2 eggs until combined.


Add the wet ingredients to the dry ingredients and mix together until all of the dry 
ingredients are fully moistened.


Next, add 1 cup of small diced cooked ham, 1 cup of shredded sharp cheddar cheese, 
1 cup of corn and green onions to the batter.  Mix well.


Remove the skillet from the oven and swirl the melted shortening around the pan 
coating the bottom and sides completely.  Discard any excess.  Pour the batter 
into the hot skillet and spread evenly.  Sprinkle the remaining cheddar cheese on top.


Place into the oven and bake for 25-30 minutes or until a toothpick inserted into 
the middle comes out clean.  Rest for 5 minutes before cutting and serving.  
Yield: 8 pieces.

Cook's note:
The process of preheating the cast iron skillet gives the cornbread an incredibly crunchy 
and delicious crust.  If you don't have a cast iron skillet, you can use a square 8x8 inch 
baking dish or a deep dish 9 inch pie plate.  

Thursday, December 25, 2014

Pumpkin Pie Recipe


pumpkin pie

star rating(100)rate this recipe »
KAF GUARANTEED
Hands-on time:
Baking time:


This is a rich, spicy pie that slices well and has a bright pumpkin flavor. Two hints for a better result: mix the filling together a day in advance to give the spices a chance to blend, and be sure to remove the pie from the oven while the center is still wobbly; overcooking it will cause the filling to crack. Light Spice Cookie cutouts are an easy way to dress up the top of the pie for company.

Our Guarantee: This pie will be spicy and rich, and slice well once chilled.

See the recipe being made, start to finish, at how2heroes.com. Note that the video calls for a different oven temperature and baking time than the recipe; that's fine, either can be successfully used.


ingredients

filling

  • 1/2 cup granulated sugar
  • 1/2 cup brown sugar
  • 1 tablespoon King Arthur Unbleached All-Purpose Flour
  • 1/2 teaspoon salt
  • 1 teaspoon ground ginger
  • 1 teaspoon ground cinnamon
  • 1/2 teaspoon nutmeg
  • 1/8 teaspoon ground cloves
  • 1/8 teaspoon freshly ground black pepper (optional)
  • 3 large eggs, beaten
  • 2 cups (or one 15-ounce can) pumpkin
  • 1 1/4 cups light cream or evaporated milk

crust

directions
1. In a large mixing bowl, whisk together the sugars, flour, salt, and spices.

2. In a large measuring cup, beat together the eggs, pumpkin, and cream or evaporated milk. Whisk into the dry ingredients. For best flavor, cover and refrigerate the filling overnight before baking.

3. Lightly grease a 9" pie pan that's at least 1 1/2" deep. Roll the pie dough out to a 13" circle, and transfer to the pan. Crimp the edges above the rim; this will give you a little extra headroom to hold the filling when it expands in the oven. Refrigerate the crust while the oven preheats to 400°F.

4. When the oven is hot, place the pie pan on a baking sheet to catch any drips. Pour the filling into the unbaked pie shell.

5. Bake for 45 to 50 minutes, until the filling is set 2" in from the edge. The center should still be wobbly. Remove the pie from the oven and cool on a rack; the center will finish cooking through as the pie sits.

nutrition information
Serving Size: 1 slice, 172g Servings Per Batch: 8Amount Per Serving: Calories: 327 Calories from Fat:108 Total Fat: 12g Saturated Fat: 5 Trans Fat: 0gCholesterol: 96mg Sodium: 329mg Total Carbohydrate: 48 Dietary Fiber: 2g Sugars: 31Protein: 8g

* The nutrition information provided for this recipe is determined by the ESHA Genesis R&D software program. Substituting any ingredients may change the posted nutrition information.

tips from our bakers

  • This recipe makes enough filling to generously fill a 9" pan that's at least 1 1/2" deep. If your pan isn't quite that big, you can bake any leftover filling in custard cups; it will take 25 to 30 minutes to cook.
  • Pumpkin pie filling is basically a custard; the eggs in the filling will continue cooking as the heat from the edge of the pie moves toward the center, which is why it's important to remove the pie from the oven before the center is completely set. Leaving it in the oven too long will cause the eggs to overcook, tightening the proteins and causing the pie to crack in the center.
  • Mixing the filling a day in advance (refrigerate until using) will improve the flavor of this pie by giving the spices' flavors a chance to blend.


Wide Width Damask Jacquard Curtain  - Besthomefashion.com

View more gifts at Zazzle.

Blog Archive